OOMMF Tutorial Part 3: mif Files and Examples
Part 3 of this getting started tutorial for OOMMF introduces mif problem files and some of the example files that come with OOMMF distributions. Part 1 covered downloading and installing OOMMF. Part 2 covered running OOMMF.
mif Files
Micromagnetic calculations in OOMMF are set up in a mif problem file. A mif file is written in tcl and includes components such the calculation region, mesh size, initial magnetisation configuration and magnetic anisotropy energies. Some of the elements of a mif file are required, whereas some depend on exactly what you are trying to simulate. Rather than write your mif file from scratch, it’s often best to use an existing file as a starting point and modify it to your needs.
https://youtu.be/UMnJ_j4V0hs OOMMF comes with a number of very useful example files, but it can sometimes be difficult to know where to start. I’ve selected here some of those that I’ve found useful and picked out the relevant sections of the files. OOMMF Help on mif files
OOMMF Examples
OOMMF comes with a 3d micromagnetic problem solver, Oxsii. Getting started with this can be a bit daunting, but thankfully it comes with a range of examples which you can use to build up the different component that you need for your simulation system. I’ve picked out some of the examples that I’ve found useful in the past. For each one I’ve tried to pick out and highlight the most relevant sections. You can find these and many more similar examples in oommf/app/oxs/examples https://www.youtube.com/watch?v=4OORBusgFoY
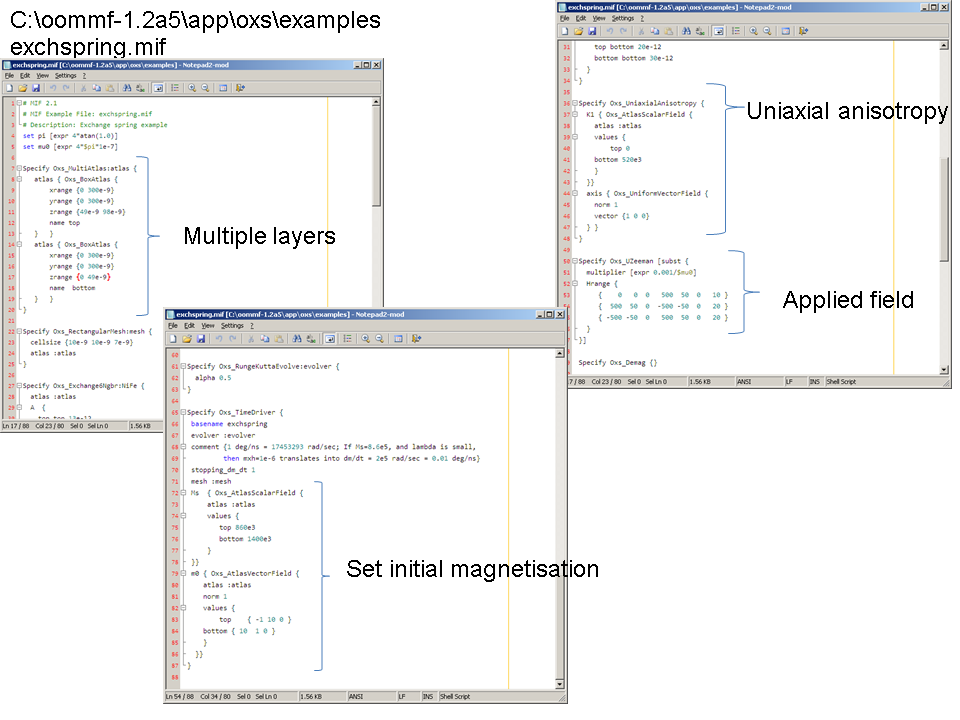
Example 1: Exchspring.mif
- Multiple layers
- Setting initial magnetisation
- Uniaxial anisotropy
- Simulating and applied field
 |
|---|
| Exchangepring.mif: Multiple layers, initial magnetisation, uniaxial anisotropy, applied field |
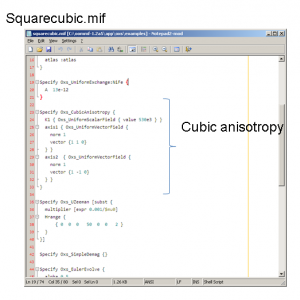
Example 2: Squarecubic.mif
- cubic anisotropy
 |
|---|
| Squarecubic.mif: use of cubic anisotropy in a problem file. |
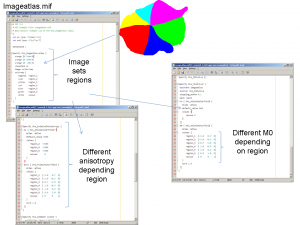
Example 3: Imageatlas.mif
- Using a bitmap to define the simulation geometry.
- Colours define different regions within the simulation.
- Setting anisotropy and initial magnetisation for different regions.
 |
|---|
| Imageatlas.mif: Using a bitmap to define simulation regions. |
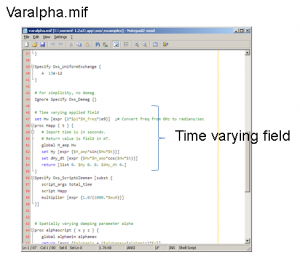
Example 4:varalpha.mif
- Use a 'proc' to define a time-varying field
 |
|---|
| Varalpha.mif: using a proc to define a time-varying magnetic field. |
Example 5: one of my own
- Setting automatic output
1
2
3
4
5
6
7
8
9
# Create destinations
Destination my_graph mmGraph
Destination my_archive mmArchive
Destination my_display mmDisp
# Specify what should be saved
Schedule DataTable my_graph Step 1
Schedule DataTable my_archive Step 1
Schedule Oxs_TimeDriver::Magnetization my_display Stage 1
Schedule Oxs_TimeDriver::Magnetization nbsp;my_display Step 1
A step is a single iteration, while a stage is for example reaching equilibrium after one value of applied field.
Going further
As you carry out your own simulations and introduce more complicated elements you’ll begin to build up a library of your own useful examples. Rather than starting from scratch each time you’ll be able to build on these.