Basic Git - Simple Collaborative Working
Git is a versioning control software which helps keep track of changes to plain text files. The popularity of git has been helped by the existence of products and services like Gitlab and Github which simplify some of the server-side operation of git. Git has a famously steep learning curve and it can be difficult to know where to start.
There are many guides available on the internet introducing different aspects of git. This post explores one possible basic git implementation for a project with a few people. I’m going to assume that you have installed git, and possibly had a play around with some of its commands. This is my attempt to pull together some of those basic git experiences into a simple, usable whole suitable for collaborative working.
A Basic Git Collaborative Working Setup
It can be difficult to see how git can be set up to work collaboratively. Clearly it has all the component pieces to do this, but what would collaborative working look like? And how would you set it up? The following is one possible way you could run a basic git collaborative project.
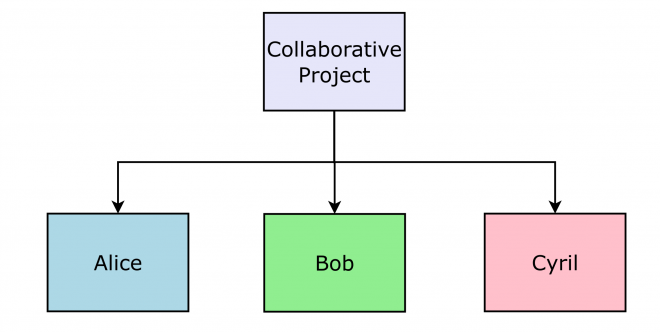
I’m assuming that there are three people working on a coding project (Alice, Bob and Cyril). They have created a new repository on Github for their project and want to get started using it. The following steps are ones that Alice, Bob and Cyril could work through to get up and running.
A note on branching. Git has very powerful branching capabilities, but in this example I am going to simplify things so that the project only works on the single, ‘master’ branch. This is likely to be acceptable for many hobby-projects, and possibly some production projects too.
 |
|---|
| basic git - collaborative project |
1. Cloning A Repository
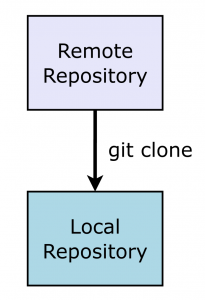
Git is designed to allow you to work offline, but still have access to a remote repository. A remote git repository sits on a server (such Github, Gitlab or Bitbucket). Collaborators can make a ‘clone’ of this repository on their own machines to get a local copy of the project to work on as well as a connection to the shared repository for your project.
The ‘git clone’ command will create a folder inside the current directory. This folder will have the same name as the remote repository and will contain a local instance of it. This local repository will be configured to have the github repository as its ‘origin’ which means that Alice, Bob and Cyril can each push their changes to the central repository.
 |
|---|
| basic git - git clone |
2. The Local Git Repository
The main point of interaction with git is with the local repository. Git notices changes to files within the repository. If a file is created then git notices, and if that file is updated, git notices that too. Git, like other version control software lets you keep track of changes as a series of ‘commits’. Each commit is like a unit of change and with git you can look back at previous versions of the files within the repository.
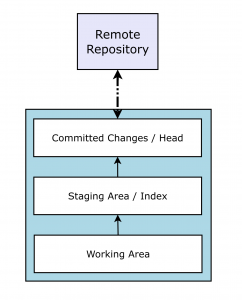
The local git repository has three areas: unstaged/working area, staged/index area, and committed or ‘HEAD’. The staging area is where you mark files to be included in a commit. To add files to the git staging area use:
1
git add file_name
Once the file has been added to this staging area you can commit the changes to the committed area, known as the ‘head’. You can do this with
1
git commit -m "Summary of changes in commit"
To see which files git is aware of, and which it thinks have changed, you can use the command ‘git status’. This will tell you which files within the repository have changed since the last commit, and which are in the staging area (index).
 |
|---|
| basic git - repository areas |
Alice, Bob and Cyril will each work on their local, cloned copy of the remote repository. Alice is working in her repository and makes a change to the file ‘my_file.txt’. She saves the file and checks that git has recognised those changes using ‘git status’. The file is in the working area and she moves it into the staging area with ‘git add my_file.txt’.
Alice then checks that the file is now in the ‘index’ using ‘git status’ once more. She commits the changes using the command ‘git commit -m “Make some changes to my_text.txt”. This final command commits these changes to her local git repository. From then on git will look for any changes in the working area compared to this most recent commit.
3. Getting Updates From The Remote Repository
Running git status also lets you know how your local repository compares to the remote origin. This is useful when working collaboratively as it allows you to see what changes others have made.
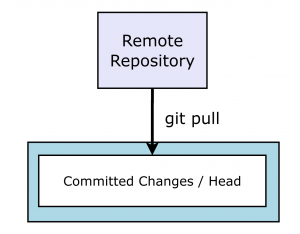
Alice uses git status and sees that she is behind the remote origin by a few commits - Bob has already made a few changes. She will need to retrieve the changes in these commits to catch up. To retrieve the most recent version from the remote origin repository she needs to use git pull. The ‘git pull’ command retrieves the commits from the remote origin and merges them into Alice’s local repository.
 |
|---|
| basic git - git pull |
The ideal situation is that that Bob’s changes in no way conflict with any changes Alice has made. If there are not any ‘conflicts’ then git will happily merge Bob’s changes into Alice’s and Alice will have the most recent version of the code. If there are conflicts (which is likely if Alice and Bob were working on the same file or area of code at the same time) then Alice will need to resolve them (see ‘Dealing With Conflicts’)
4. Dealing With Conflicts
Git will attempt to merge the local and remote repositories automatically. This usually works will if collaborators had worked on different files or different areas of the same file. If they had both edited the same section of the same file, this can result in a ‘conflict’. Conflicts need to be resolved manually. Git will tell you which files it was unable to merge. Resolving a conflict manually means opening up each file in an editor and making a decision about which version of the file to keep: either the local version, or the version from the remote repository. If you open up a conflicted file in a text editor, you will see that git has added some information to show where the conflict occurred. For example:
1
2
3
4
5
<<<<<<<
Changes on your local repository.
=======
Changes made on the remote repository.
>>>>>>>
In this case the local version would be between <<<<<<< and =======. The remote version would be between ======= and >>>>>>> . To manually resolve this conflict you would delete the markers and only keep the version that you wanted. To let git know that you are happy with the merged files you need to ‘add’ them to the staging area again using git add. You finalise the merge with a git commit command, just like a normal commit.
5. Adding to the Remote Repository
It is the remote repository that is the main project repository. It is used to keep track of changes from Alice, Bob and Cyril. Once changes are made to a local repository they need to be added the remote repository. Once Alice has made a number of changes to her local repository, she wants to add them to the remote repository, so that Bob and Cyril can see what she has been up to. To do this she needs to ‘push’ her changes to the remote origin of their cloned repositories. There is a catch, however. Alice could have made changes that conflict with those that Bob or Cyril have made. It is the local repository that is designed to resolve any issues and conflicts, so before pushing to the remote origin, she needs to check that there are not any conflicts between it and her local repository. This is done by running . If this runs successfully then we can run git push to send our changes to the remote origin. Bob and Cyril can then pull these changes into their own local repositories and continue working with them. If the git pull reveals conflicts between our changed code and the remote repository, then we need to resolve those conflicts as in ‘Dealing With Conflicts’. We can then push the resolved conflicts (which includes our changed code) to the remote repository.
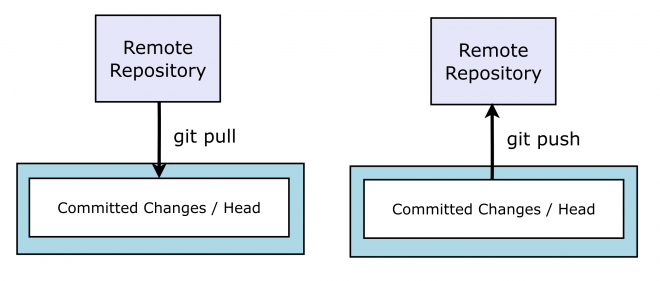 |
|---|
| basic git - pull and push |
Basic Git Daily Working
To summarise this basic git approach, let’s go over what a usual work flow might look like:
- git status - to check the current status of the repository
- git pull - to retrieve any changes from the remote respository
- Make changes to files in local repository
- git add - to add files to the git staging area
- git commit - to commit any changes to the local git repository
- git pull - to check there are no other changes on the remote server
- git push - send any new commits from the local repository to the remote
Conclusion
This post has only introduced one possible basic git usage. There are, I am sure, many ways this approach could be improved, adapted and refined. Such a basic approach has not explored undoing changes (which can be more complicated than you might expect), working with branches (which git does very well), and git merging strategies. Hopefully this post has at least given you enough of a sense of how git can be used as part of a small team or simple project, and you can build on this simple workflow to add more powerful git capabilities for your own projects.