How To Use Firefox SQLite Manager
With the Firefox SQLite Manager Plugin it’s easy to view, update and export SQLite databases. It’s very easy to install Firefox SQLite Manager, but I found it wasn’t obvious how to actually use it. This post walks you through the steps to load up the manager once you’ve installed it.
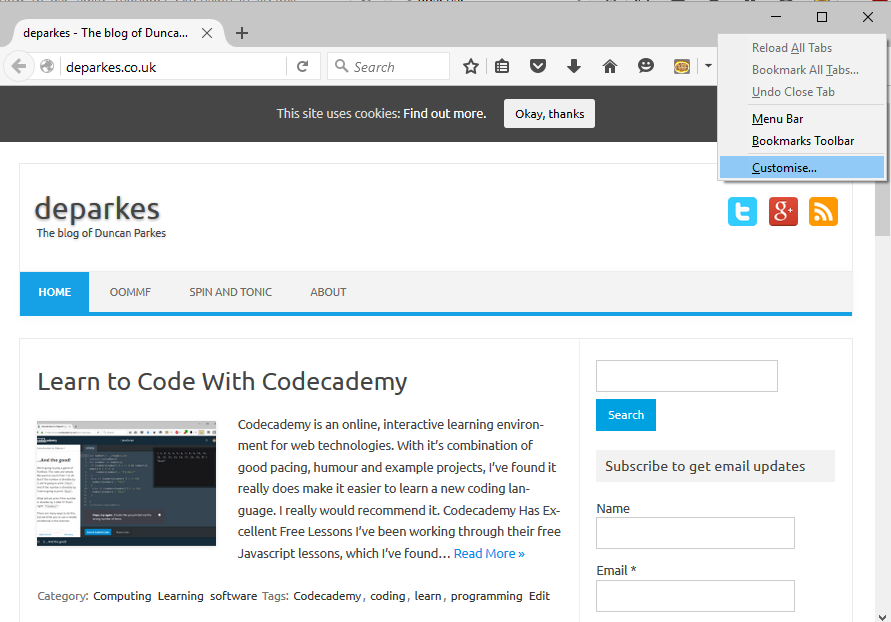
1. Right Click on The Firefox menu bar and click "Customize..."
Once you’ve installed the Firefox SQLite manager, there aren’t really any clues about what to do next. We need to drag the plugin icon onto our menu bar.
 |
|---|
| firefox sqlite manager - customize |
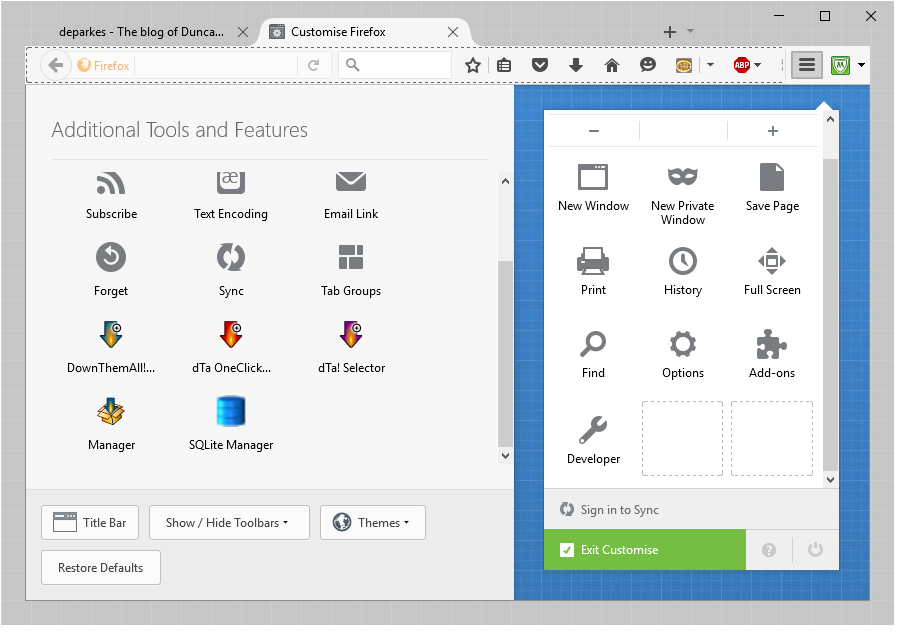
2. Find The "SQLite Manager" icon in the "Additional Tools and Features" Pane
The new Firefox SQLite Manager icon will be in amongst the icons for other plugins you’ve installed, as well as some of the pre-installed Firefox tools.
 |
|---|
| firefox sqlite manager - additional features |
3. Drag The Icon To Your Menu Bar
It doesn’t really matter where you drag the icon - just find space where you can.
| firefox sqlite manager - drag |
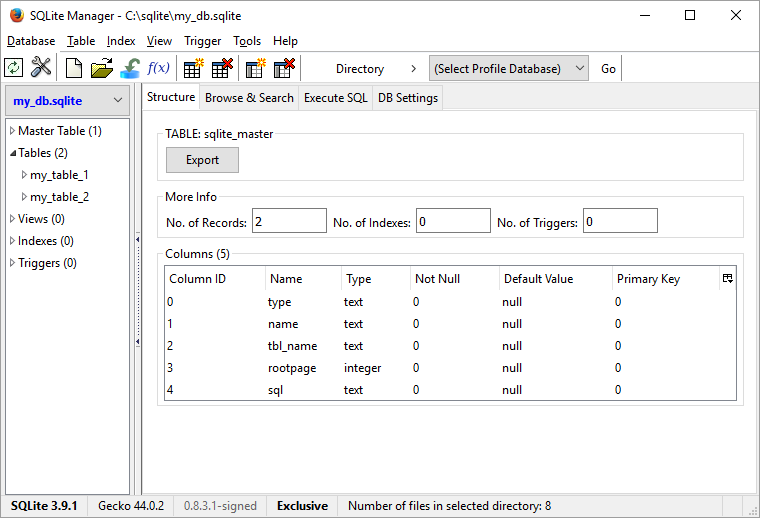
4. Start Using the Firefox SQLite Manager
Once you’ve got the icon where you want it you just need to click on it to load up the manager. When you open it up you can either create a new database or work on an existing one, and you’ll find all the usual SQL tools available.
 |
|---|
| firefox sqlite manager - example |