RecordMyDesktop and Blender
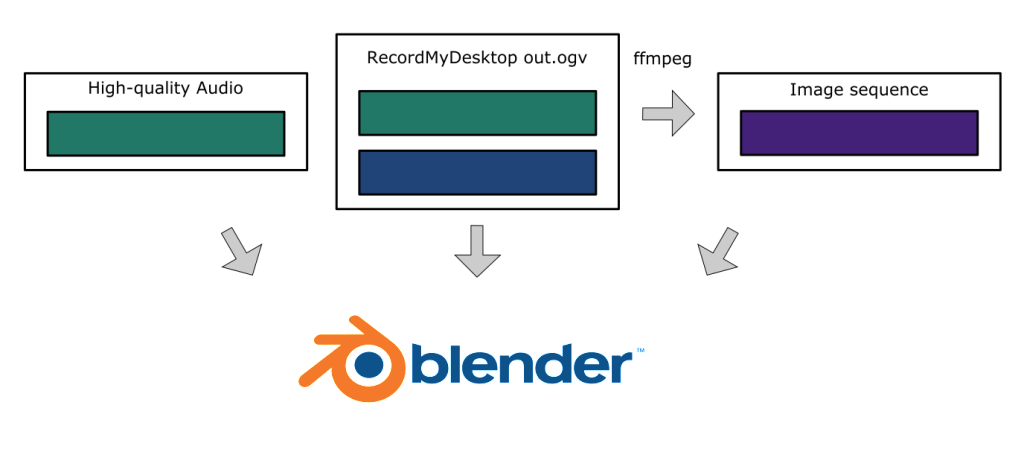
I’ve had a lot of problems with the rendered output video when using the ogv output from RecordMyDesktop and Blender. It would jump around and not always be in-sync with the audio. I tried a few things including converting the ogv file to different video formats, but nothing seemed to work consistently. In the end I’ve had the most success with converting the ogv movie to an image sequence, with one image for each frame. In this post I show you what I do.
My Process
My usual process is to record both the audio and video in RecordMyDesktop, as well as simultaneously making a higher quality sound recording in Audacity. I haven’t got to the bottom of what was at fault, but my current solution of converting the video to individual images seems to be working for now. Read on for more information about the indvidual steps.
Convert A Movie To a Series of Images With ffmpeg
You can easily convert an movie to a series of images using ffmpeg
1
ffmpeg -i out.ogv image_%4d.png
This command will produce an image with the name image_xxxx.png where xxxx is the frame number.
More useful ffmpeg and mencoder commands
An obvious and immediate disadvantage of doing this is that my original movie was around 50MB, whereas the 10000 frames comprising it totalled about 5GB - about 100 times bigger. This has been fine for me so far, but videos longer than the 5 - 10 minutes I’ve been dealing with so far could end up taking up too much space.
Load Image Sequence Into Blender
You can load an image sequence into the Blender NLE by going to Add -> Image and selecting all of the images/frames you want to import from the RecordMyDesktop video. See this video for more on how to load an image sequence into Blender: https://www.youtube.com/watch?v=OGapXgrLOnI Also load into Blender the original RecordMyDesktop output movie file. We will use our new image sequence to actually do the editing of clips but we can use the audio track from the ogv file to synchronise with the audio from the high-quality audio recording made in Audacity.
