Batch Crop Images With Imagemagick
How to Batch Crop Images With Imagemagick
Imagemagick is a powerful, command-line based program for manipulating images. In this post I’ll show you how to use Imagemagick to crop several images with one command.
Find some more useful Imagemagick commands
Crop a Single Image
We’ll start by looking at how to crop a single image using Imagemagick. First download Imagemagick if you haven’t already. First, open a command window in the folder containing the image(s) you want to crop. The command we want to run looks like this:
1
convert -crop x_sizexy_size+x_offset+y_offset inputfile outputfile
the different dimensions in the image we want to crop are shown below
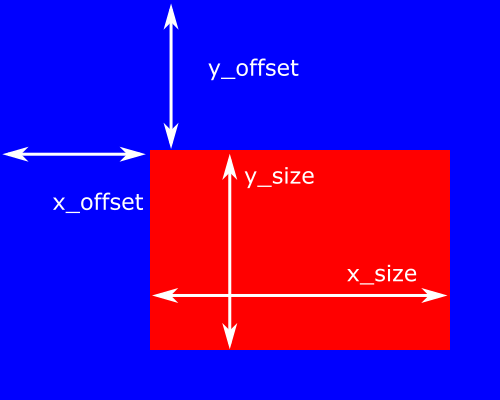 |
|---|
| batch crop - Batch Crop Images |
let’s try running the Imagemagick crop command on this image to crop away all of the blue area, leaving only the red. I’ve measured the pixel dimensions in mspaint, so I know exactly the area that I want to crop to. So the command is:
1
convert -crop 300x200+150+150 CropLayout.png CroppedLayout.png
Which outputs the image ‘CroppedLayout.png’
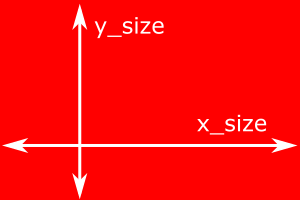 |
|---|
| batch crop - Batch Crop Images |
Batch Crop a Folder of Images
That was the basic usage, but we can also combine it with the Imagemagick batch processor mogrify to crop many images at the same time. In this example we’ll crop a whole folder full of images to the same dimensions as in the example above. Here’s what we’re starting with:
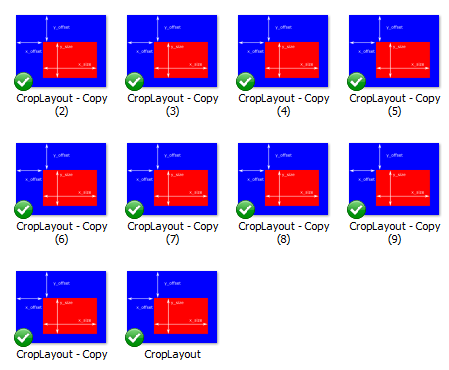 |
|---|
| batch crop - Batch Crop Images |
First we’ll make a new folder called ‘cropped’ to keep the cropped images in. Now we’ll run the command with a couple of changes:
1
mogrify -crop 300x300+150+150 -path ./cropped *.png
firstly we’ve specified the output to go to the cropped folder using the ‘-path’ flag. Secondly we’ve told mogrify to look for all .png files in the current folder.
If we look in the cropped folder once we’ve run this command we get this
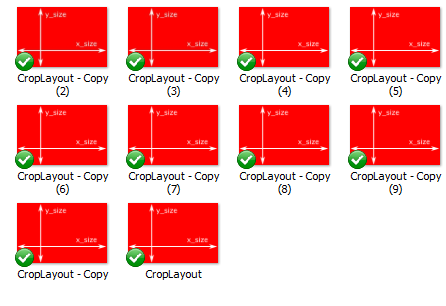 |
|---|
| batch crop - Batch Crop Images |