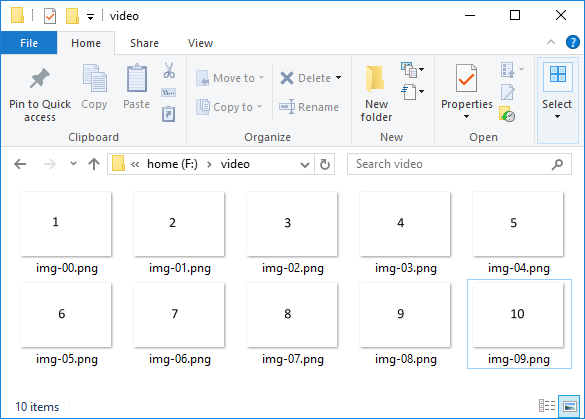
Turning a sequence of images into a video can be useful for creating stop-frame movies, scientific animations, and simple slide shows. This post shows you how you can use the free command line tool ffmpeg to create a video from images. ffmpeg is a powerful, versatile command line tool which is widely used for other movie and animation manipulation tasks.
Prepare Your Image Files
It’s actually quite easy to create a video from images using ffmpeg, as long as you prepare your image files in right way.
You need to make sure your sequence of images are in the same folder and named correctly. They should be named sequentially, for example img-00.png, img-01.png, img-02.png and so on. By default ffmpeg expects that images should be numbered starting from zero.

Create a Video From Images
Once you have your source images named correctly and in the same directory, you can run this command at the command line (from inside your image directory):
ffmpeg -i img-%02d.png video_name.avi
In this example, ffmpeg will look for images with file names with ‘img-‘ followed by a two-digit number and a .png file extension, and convert these images into a avi video file named ‘video_name.avi’.
In this command you need to specify a search pattern for ffmpeg to find the image sequence it should use. This search pattern depends on what you named your images when preparing them.
Setting The Frame Rate
An important consideration when you create a video from images is the frame rate – the number of frames (images) per second (fps) in the video. The most appropriate frame rate will depend on your source images. If you are making a stop-frame animation for example, you may be happy with the default of 25 fps. If however you want something more like a slow moving slide show, you may want a slower frame rate such as 2 fps.
If you don’t specify the frame rate, you may find some odd results in your output video file. For example, to set an output video with a frame rate of 5 fps, you would need to run:
ffmpeg -framerate 5 -i img-%02d.png video.avi
Changing the Video Format
In these examples I have used avi as the output video format. ffmpeg supports a range of different video formats and you can change the format of your output video by changing the file extension of the output video file.
To see which output formats are available you can run:
ffmpeg -encoders